
Building scaffolding wrong costs more than time—it costs lives. One miscalculated base plate or forgotten cross brace can turn a routine project into an OSHA citation or worse. But here’s the thing: proper scaffolding assembly isn’t rocket science. It’s about following a proven sequence, using the right components, and never skipping the safety checks that separate pros from amateurs.
This guide walks you through:
- Essential scaffolding components and what each piece does
- Step-by-step assembly instructions from base to top rail
- Load capacity calculations so you never overload a platform
- OSHA compliance requirements every builder must follow
- Common mistakes that compromise stability (and how to avoid them)
- When to rent vs. buy scaffolding for your specific project
At EZ Access & Equipment, we’ve installed scaffolding systems for over 2,000 projects across South Florida. We know what works—and what doesn’t. Whether you’re handling the build yourself or need professional installation, we’re here to help you get it right the first time.
Essential Scaffolding Components
Every scaffold system relies on 11 core components that work together to create a stable, load-bearing structure. Miss one piece or install it wrong, and you’re looking at structural failure. Get them all right, and you’ve got a platform that can handle thousands of pounds without breaking a sweat.
Here’s what you need to know about each part.
Standards (Uprights)
Standards are the vertical tubes that form your scaffold’s main framework, bearing the entire load and transferring it to the base plates. Think of them as the spine of your structure.
Most standards are made from galvanized steel tubes measuring 48.3mm in diameter with 4mm wall thickness, and they typically come in lengths from 5 feet to 21 feet. For general work like painting, space your standards a maximum of 2 meters apart—but drop that to 1.8 meters when you’re dealing with heavy loads.
You’ll need at least two pairs per bay: inside standards (closest to the building) and outside standards (creating the bay width). Skip a standard or space them too far apart? You’re asking for collapse.
Base Plates and Sole Boards
Base plates distribute the scaffold’s weight and support the vertical standards, forming the foundation of your entire structure. They’re flat steel plates that sit at the bottom of each standard.
Sole boards sit beneath base plates and measure approximately 225mm wide by 38mm thick by 450-600mm long. These timber or steel boards spread the load over a larger surface area, preventing base plates from sinking into soft or uneven ground.
Never place base plates directly on dirt or uneven surfaces. That’s how scaffolds sink or tip during heavy rain or when crew members load materials onto platforms.
Ledgers and Transoms
Ledgers are horizontal tubes running parallel to the building’s facade that connect standards together and provide lateral support. They determine the height at which working platforms are staged and connect multiple bays at both the front and back of the scaffold.
Transoms run horizontally and support the scaffolding planks or working platforms, with main transoms providing primary support and intermediate transoms adding reinforcement for heavier loads.
In some scaffold systems, one component serves both functions—so you might hear them all called ledgers. Both are made from structural steel with a galvanizing finish.
Couplers and Clamps
Couplers hold scaffold components together—they’re different from ties, which connect the scaffold to other structures. Right-angle couplers join tubes at 90 degrees, swivel couplers connect tubes at any angle for complex configurations, and sleeve couplers connect tubes end-to-end for extended spans.
You’ll burn through dozens of couplers on a single scaffold build. They ensure tubes are joined tightly and don’t displace or move during use. Loose couplers are one of the most common causes of scaffold failures—tighten them to spec every single time.
Bracing
Braces are diagonal tubes that reinforce rigidity by controlling the unbraced length of scaffold legs and preventing the structure from swaying or falling over.
Cross braces run diagonally between ledgers and standards to increase overall rigidity, while façade braces attach on the scaffold face and run diagonally along the length at every level.
Skipping braces to save setup time? You’re gambling with physics. Wind load alone can topple an unbraced scaffold.
Platforms and Planks
Boards (also called decks or battens) form the working platform where workers stand and place tools. They’re available in wood, aluminum, aluminum frame with plywood board, or hot-dip galvanized steel.
Platforms need to support not just worker weight, but tools, materials, and dynamic loads when crews are moving around. Transoms ensure platforms are correctly aligned and securely placed.
At EZ Access & Equipment, we stock aluminum planks that are lighter than wood but just as strong—making setup faster without sacrificing load capacity. When you’re working on multi-story projects, every pound you can shave off your gear counts.
Guardrails and Toeboards
Toeboards are small vertical barriers (typically 4-12 inches tall) that prevent objects or people from falling or rolling off the side of a raised platform. They stop that dropped wrench from becoming a projectile.
Guardrails wrap the perimeter of your platform at waist height and top height. They prevent falls and ensure worker safety. OSHA requires guardrails on platforms 10 feet or higher—no exceptions.
Adjustable Screw Jacks
Adjustable screw jacks provide a level base for scaffolding platforms and compensate for uneven terrain, ensuring a level scaffold on any ground condition. They’re made of high-strength low alloy structural steel with zinc-plated or hot-dip galvanized finish for corrosion resistance.
Trying to level a scaffold with wooden shims? That’s amateur hour. Screw jacks give you precise height adjustment and rock-solid stability.
Ties
Ties are scaffold components installed to provide an anchor point to a building or structure, including tie tubes attached to the scaffold for lateral stability.
On tall scaffolds, ties prevent the structure from pulling away from the building. They’re your safety net against wind load and lateral forces.
Access Ladders
Ladder access provides workers with a secure means of climbing up and down the structure, and should be securely attached to the scaffold at an appropriate angle to prevent falls.
Never use the scaffold itself as a ladder. That’s how ankles get broken and OSHA citations get written.
Step-by-Step Assembly Instructions
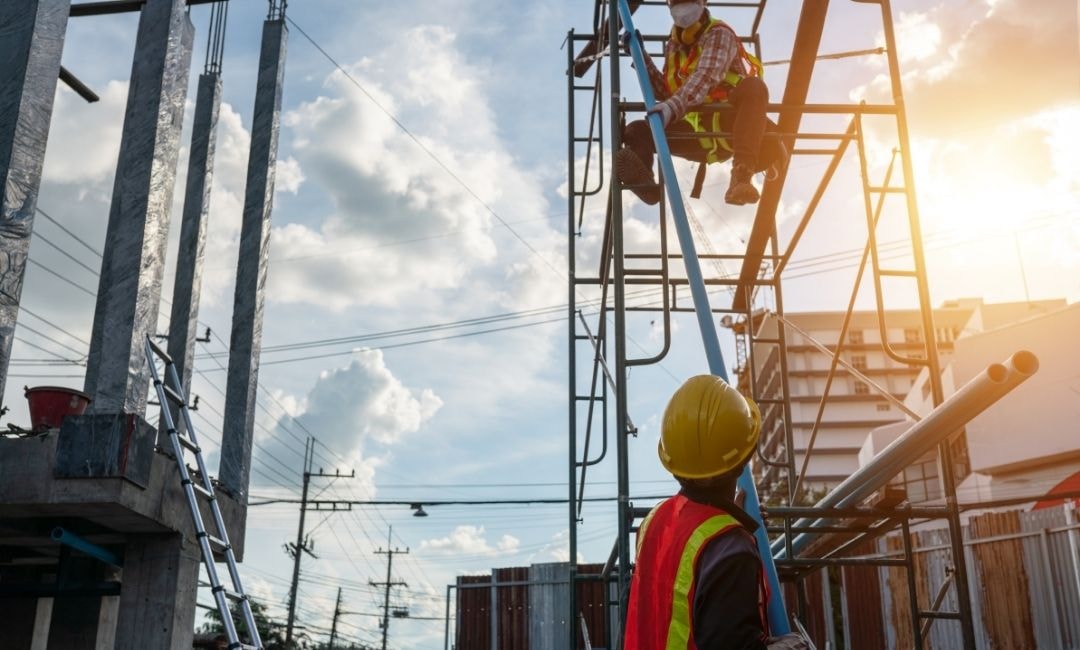
Building scaffolding isn’t a guessing game. You follow the sequence, lock everything in place, and double-check before you move up a level. Skip a step and you’re either rebuilding the whole thing or dealing with an unstable platform.
Here’s how to erect scaffolding from the ground up.
Plan Your Layout First
Before you touch a single tube, walk the site. Measure the distance you need to cover and check local building codes for setback requirements on temporary structures.
Mark where each scaffolding frame will sit. You need level ground—or at least ground you can level with screw jacks. Aware of underground utilities? Dig permits? Handle that paperwork now, not when you’re halfway through assembly.
Pre-Assembly Checklist:
- Measure total length and height needed
- Identify ground conditions (concrete, dirt, gravel)
- Check for overhead power lines or obstructions
- Verify all components are on-site and inspected
- Review plans with your crew so everyone knows the process
Set Your Base Level
Place sole boards on level, solid ground at each standard location, then position base plates on top. The sole boards should lay flat with no gaps underneath.
Install adjustable screw jacks into the base plates. Start with all jacks at roughly the same height, then fine-tune as you go. Use a level across multiple base plates—if one side is off by even an inch, you’ll fight that error all the way up.
Pro tip:If you’re setting up on soft ground after a night of rain, add extra sole boards or even plywood sheets to distribute weight. We’ve seen scaffolds sink 3-4 inches into Florida clay during summer storms because crews rushed the foundation.
Erect the First Scaffolding Frame
Insert standards into the base plates. Most standards have a spigot end that fits directly into the plate opening. For general work, space standards a maximum of 2 meters apart, but reduce that distance to 1.8 meters for heavy-duty applications.
Lock the first standard in place, then move to the other side and install its partner. You’re building one bay at a time—inside standards near the building, outside standards creating your working width.
Connect the two standards with ledgers at your desired platform height. Fasten couplers tight. Not hand-tight. Wrench-tight.
Add Cross Bracing
Cross bracing runs diagonally between ledgers and standards to prevent swaying and increase overall rigidity. Attach braces from the bottom of one standard to the top of the adjacent standard, creating an X pattern.
Every bay needs diagonal bracing on at least one face. For taller scaffolds or windy locations, brace all four faces. This isn’t optional—it’s physics.
Install Transoms and Platforms
Position transoms horizontally across the ledgers to support your working platform. Main transoms go next to the standards; intermediate transoms fill the space in between for extra support.
Lay planks across the transoms. Planks should overlap by at least 12 inches when using two pieces, and they should extend 6-12 inches past the transom edge on each end. Nothing should wobble or shift when you step on it.
Secure planks so they don’t slide during use. Some systems use clips; others rely on friction and weight. Check your manufacturer specs.
At EZ Access & Equipment, our scaffold rentals come with pre-measured components and clear assembly guides. We’ve mapped out the most efficient setup process for South Florida projects—whether you’re working on a two-story house in Coral Springs or a high-rise in downtown Miami.
Build Upward One Level at a Time
Once your first level is solid, repeat the process for the next tier. Install standards on top of the previous standards using connecting pins or built-in connections. Add ledgers, bracing, transoms, and platforms at each level.
Vertical Assembly Pattern:
- Extend standards upward
- Lock ledgers at the new height
- Install diagonal bracing
- Add transoms
- Lay platform planks
- Install guardrails and toeboards (required at 10+ feet)
- Inspect before proceeding to the next level
Never climb more than two rungs above a completed platform. That’s asking for a fall.
Secure the Structure with Ties
Install ties to anchor the scaffold to the building, providing lateral stability. Ties prevent the scaffold from pulling away from the structure during use or in high winds.
Drill holes in the building only if your plans allow it—some jobs require non-penetrating ties that hook into window openings or other existing features. Space ties every 26 feet horizontally and every 20 feet vertically (check OSHA regulations for your specific setup).
If you’re working on a historic building or a location where drilling isn’t an option, discuss alternatives with your supervisor. Counterweights and ballast systems exist, but they require calculations.
Add Access Ladders and Safety Rails
Attach access ladders securely to the scaffold at an appropriate angle. Ladders should be on the inside of the scaffold, not leaning against the outside where they can slip.
Install guardrails at every open side of every platform 10 feet or higher. Add toeboards (4-12 inches tall) to prevent tools and materials from rolling off the edge.
Lock everything. Check everything. Then check it again.
Load Capacity Calculations
Overloading a platform is one of the fastest ways to collapse a scaffold. Every component has a weight limit, and those limits aren’t suggestions—they’re engineering calculations based on material strength and structural design.
Here’s how to make sure you never exceed capacity.
Understanding Scaffold Load Classes
OSHA defines scaffold load capacity in pounds per square foot (PSF) across different duty ratings. Your scaffold falls into one of these categories:
| Load Class | Capacity (PSF) | Typical Use |
|---|---|---|
| Light Duty | 25 PSF | Inspection, light painting |
| Medium Duty | 50 PSF | Plastering, general construction |
| Heavy Duty | 75 PSF | Masonry, stone work |
| Special Heavy Duty | 125+ PSF | Concentrated loads, machinery |
Calculate your platform area in square feet, multiply by the duty rating, and that’s your maximum load. A 10-foot by 5-foot platform rated for medium duty can hold 2,500 pounds total—that includes workers, tools, and materials.
Three workers at 200 pounds each = 600 pounds. Add 400 pounds of tools and materials, and you’re at 1,000 pounds. You’ve got room to spare. But stack another pallet of bricks up there? You’re pushing limits.
Real-World Load Planning
Most builders make the same mistake: they forget to count everything. A circular saw weighs 10-15 pounds. A toolbox adds another 50. Lumber stacks up fast—a bundle of 2x4s can hit 100+ pounds depending on the length and species.
What counts toward your load:
- Worker body weight (assume 250 pounds per person for safety margin)
- Tools in use on the platform
- Materials stored on the platform
- Equipment like mixers or compressors
- Temporary storage (that pile of debris you plan to remove “later”)
Pro tip:Never use more than one-quarter of your platform for material storage. The rest is working space. When crews start stacking supplies wall-to-wall, accidents happen.
If you’re running a job that requires heavy materials on elevated platforms, EZ Access & Equipment can help you spec the right scaffold system. We’ve done load calculations for projects ranging from HVAC installations to façade restoration—and we know which frame configurations handle concentrated weight without sagging.
Recognizing Overload Signs
Your scaffold will tell you when it’s stressed. Watch for:
- Bending or bowing in ledgers or transoms
- Loose connections that were tight during assembly
- Cracking sounds from planks under load
- Base plates sinking into the ground
- Visible deflection when workers walk across the platform
See any of these? Stop work immediately. Remove weight from the platform and inspect the entire structure. Pushing through “just to finish this section” is how people get hurt.
Load Distribution Basics
Concentrated loads are more dangerous than distributed loads. Placing 500 pounds in the middle of a 10-foot plank stresses it differently than spreading that same weight across the entire length.
Keep heavy materials near support points (transoms and standards). Avoid placing loads at the center of unsupported spans. If you need to store something heavy, position it directly over a transom or as close to a standard as possible.
OSHA Compliance Requirements

OSHA doesn’t write scaffolding regulations for fun—they write them because people die when shortcuts happen. Every requirement exists because someone, somewhere, learned the hard way that skipping that step kills workers.
Here’s what you need to follow to stay compliant and keep your crew safe.
Competent Person Requirements
OSHA mandates that a “competent person” must inspect scaffolding before each work shift and after any event that could affect structural integrity.
A competent person isn’t just someone with a hard hat and a clipboard. They need:
- Training to recognize scaffold hazards
- Authority to take corrective action
- Knowledge of OSHA regulations (specifically 29 CFR 1926 Subpart L)
They inspect all connections, bracing, ties, planks, and guardrails. They sign off that the scaffold is safe to use. No signature? No one works on that scaffold.
EZ Access & Equipment offers Competent Swing Stage Training and scaffold safety training programs that meet OSHA standards. If your crew doesn’t have a certified competent person, we can get them qualified—fast.
Fall Protection Standards
Guardrails are required on all open sides of platforms 10 feet or higher. The system needs three components:
- Top rail at 42 inches (±3 inches) above the platform
- Mid-rail at 21 inches above the platform
- Toeboard at least 3.5 inches tall to stop tools from rolling off
Personal fall arrest systems (harnesses, lanyards, anchor points) are your backup when guardrails aren’t feasible. But guardrails come first—they’re your primary protection.
Planking and Platform Rules
Platforms must be:
- Fully planked or decked between the front edge and guardrail
- At least 18 inches wide (20 inches preferred)
- Free of holes, cracks, or warping
- Secured against sliding or shifting
Gaps between planks or between planks and the building can’t exceed 1 inch. Anything wider becomes a trip hazard or allows tools to fall through.
Access and Egress
Ladders must be securely attached and positioned at a safe angle. Workers can’t climb the scaffold frame itself unless it’s specifically designed as a ladder-type scaffold.
Ladder access points need:
- A rest platform every 35 feet of vertical climb
- Clear space at top and bottom
- Proper tie-off to prevent shifting
Using the cross bracing as a ladder? That’s a violation and a fast way to twist an ankle when a coupling gives way.
Load Limits and Posting
Every scaffold needs a load rating tag visible to all users. Green tags indicate the scaffold passed inspection and is safe for use, while yellow tags mean caution or restricted access.
The tag should list:
- Maximum intended load
- Inspection date
- Competent person signature
- Any use restrictions
Red tags mean “do not use”—the scaffold is incomplete, damaged, or non-compliant.
Weather and Environmental Factors
Work stops when weather creates hazards. High winds (typically 20+ mph), ice, or heavy rain can make scaffolds dangerous even when they’re assembled correctly.
You also need to maintain clearances from power lines—at least 10 feet for lines under 50kV. Get too close and you’re risking electrocution even without direct contact.
Documentation Requirements
Keep records of:
- Daily scaffold inspections
- Assembly and modification approvals
- Training certificates for competent persons
- Manufacturer specs for all components
OSHA can request these documents during an inspection. Missing paperwork = citations, even if your scaffold is perfectly safe.
Bottom line? Regulations aren’t red tape—they’re the baseline for not killing your crew. Follow them every single time.
Common Mistakes That Compromise Stability
Even experienced crews make errors that turn safe scaffolds into hazards. Some mistakes collapse structures immediately. Others create slow failures that don’t show up until someone’s standing 30 feet up.
Here’s what goes wrong most often—and how to avoid it.
Skipping Base Leveling
You’d be surprised how many scaffolds start crooked. Crew places base plates on uneven ground, figures “close enough,” and builds upward. By the third level, the whole structure leans.
- The fix: Use screw jacks at every base plate. Level across the entire scaffold before you install the first standard. A 2-degree tilt at ground level becomes a 2-foot offset at 20 feet high.
On soft ground, use sole boards that are wide enough to distribute the load. In one location we worked, a crew skipped this step during wet season—their scaffold sank 6 inches overnight and had to be completely disassembled.
Under-Bracing the Structure
Bracing controls unbraced leg length and prevents swaying. Leave it off because it’s “faster” or because “it looks stable,” and you’re gambling with physics.
Every bay needs diagonal bracing. Taller scaffolds need bracing on all four faces, not just the ones facing the building. Wind load doesn’t care about your shortcuts.
- The fix:Install cross bracing as you build, not as an afterthought. If you’re missing braces or they don’t fit, stop and get the right components. Improvising with rope or wire? That’s not bracing—that’s decoration.
Loose or Missing Couplers
Couplers must be tightened to spec so tubes don’t displace during use. Hand-tight isn’t enough. You need a scaffold wrench and actual torque.
We’ve inspected scaffolds where 30% of couplers were barely finger-tight. The scaffold stood up because nothing was loaded yet. Add workers and materials, and those connections slip.
- The fix: Tighten every coupler with a wrench during assembly. During daily inspections, check random couplers on each level. If you find loose ones, check them all.
Overloading Platforms
Load capacity depends on bay spacing, component strength, and duty rating. Crews ignore this and stack materials until the planks sag.
The worst offenders: storing full bundles of lumber, pallets of block, or heavy equipment without calculating total weight. Then wondering why transoms bend or standards buckle.
- The fix: Know your load class and stick to it. Distribute weight near support points. Remove materials as soon as possible instead of using the scaffold as a storage rack.
Ignoring Ties to the Building
Freestanding scaffolds are fine up to a certain height. Beyond that, you need ties. Ties anchor the scaffold and provide lateral stability.
Skipping ties because “we’re only going to be up there for a few hours” is how scaffolds peel away from buildings. Wind gusts don’t wait for convenient timing.
- The fix: Follow tie spacing requirements—typically every 26 feet horizontally and 20 feet vertically. Use proper tie components, not rope or wire “solutions.”
Incomplete or Damaged Guardrails
Guardrails prevent falls and are required at all open platform edges 10 feet or higher. Leaving one section open “just until we finish this task” is how people fall.
Bent or damaged rails that don’t meet height requirements aren’t compliant. Neither are rails made from random lumber or PVC pipe instead of proper scaffold components.
- The fix:Install full guardrail systems on every platform before anyone works there. Inspect rails daily. Replace damaged components immediately.
Using Damaged or Modified Components
Bent tubes, cracked couplers, warped planks—these should never make it onto a scaffold. But they do, because crews don’t inspect components before assembly or because “it’s only a little bent.”
Modified components are worse. Drilling holes in tubes, welding on unauthorized connections, or cutting planks to fit—all of these compromise structural integrity.
- The fix: Inspect every component before use. Reject anything damaged, rusted through, or modified. If it’s not in manufacturer spec, it doesn’t go on your scaffold.
Poor Plank Overlap and Spacing
Planks need proper overlap when using two pieces, and gaps between planks can’t exceed 1 inch. Short overlaps let planks separate under load. Wide gaps become trip hazards.
Planks that extend too far past support points can tip when someone steps on the end. Planks that don’t extend far enough leave insufficient work surface.
- The fix: Overlap planks by at least 12 inches. Extend 6-12 inches past transoms on each end. Check that all planks are secured and can’t shift during use.
Forgetting Access Requirements
Using the scaffold frame as a ladder saves time until someone slips and breaks a leg. Proper access ladders must be securely attached at appropriate angles.
Ladders placed on the outside of the scaffold can slide away. Ladders without proper tie-offs shift during climbing. Both create fall risks.
- The fix:Install dedicated access ladders on the inside of the scaffold structure. Secure them at top and bottom. Add rest platforms on tall climbs.
At EZ Access & Equipment, we see these mistakes all the time during site visits. That’s why we offer professional installation services—our crews have assembled correctly over 2,000 scaffolding systems across South Florida. We know what works and what fails, and we make sure your scaffold is built to OSHA standards from the ground up.
When to Rent vs. Buy Scaffolding
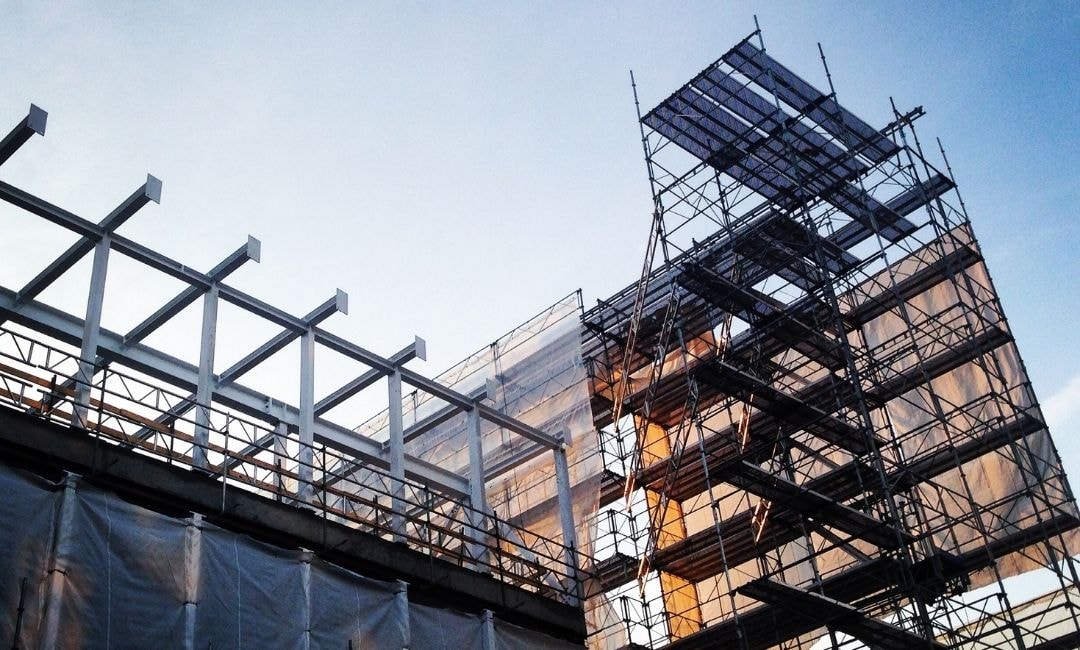
Buying scaffolding sounds smart until you’re storing 10,000 pounds of steel in your yard and paying maintenance costs on equipment that sits unused 8 months a year. Renting looks expensive until you calculate what ownership actually costs.
Here’s how to decide which option makes sense for your situation.
Run the Numbers First
Scaffolding isn’t a one-time purchase. You’re buying:
- Initial components (frames, planks, couplers, bracing)
- Replacement parts as things wear out or get damaged
- Storage space (warehouse or yard rental)
- Transportation (truck and trailer for moving between jobs)
- Maintenance and inspection costs
- Insurance for owned equipment
Quick math: A basic scaffold system for a two-story house runs $3,000-$5,000 to purchase. Rental for the same setup costs $200-$400 per month.
If you use that scaffold 3 months per year, you’ll break even on purchase cost in 3-4 years. But factor in storage ($100-$300/month), maintenance (10-15% of purchase price annually), and transportation, and that break-even point stretches to 6-8 years.
When Buying Makes Sense
You should consider purchasing if:
- You run scaffold jobs year-round. Contractors who need scaffolding 9+ months annually save money with ownership.
- You handle repetitive projects. Same height, same configuration, same location means you’re not constantly reconfiguring.
- You have storage space already. Warehouse or yard space you’re already paying for reduces ownership costs.
- You need specialty configurations. Custom setups that rental companies don’t stock might require purchase.
Buying works for established contractors with steady work volume. If you’re billing scaffolding as a line item on every job and using it constantly, ownership pays off.
When Renting Wins
Rental makes more sense when:
- Your scaffolding needs vary by job. Different heights, different configurations, different load requirements mean you’d need to buy multiple systems.
- You work sporadically. Using scaffolding 2-4 months per year means you’re paying to store idle equipment the rest of the time.
- You don’t have storage or transportation. Renting eliminates the need for warehouse space and delivery trucks.
- You want the latest equipment. Rental fleets include newer, better-maintained components than many contractors can afford to buy.
- You need installation services. Many rental agreements include setup and takedown, saving labor costs.
At EZ Access & Equipment, we offer flexible rental terms for South Florida contractors—from short-term weekend rentals to long-term project agreements. Need scaffolding for a two-week exterior paint job in Boca Raton? We deliver, install, and pick up when you’re done. Running a six-month renovation in Fort Lauderdale? We’ll set you up with a monthly rate that beats ownership costs.
Hidden Costs of Ownership
Scaffolding depreciates fast. Heavy use, weather exposure, and rough handling mean components don’t last forever. Plan on replacing:
- Planks every 3-5 years (warping, splitting, wear)
- Couplers every 5-7 years (thread wear, rust)
- Standards and ledgers every 10-15 years (bending, corrosion)
You also need regular inspections by a competent person—that’s either paying someone or taking time away from billable work to do it yourself.
Storage adds up too. Scaffolding components are bulky. You need space that’s dry, secure, and organized. Leaving it outside means rust and faster deterioration. Indoor storage costs money.
The Hybrid Approach
Some contractors own basic systems for routine work and rent specialized equipment for unique jobs. You might own enough scaffolding for typical residential projects but rent when you land a commercial high-rise that needs swing stages or heavy-duty frames.
This works if you accurately track usage. Buy what you use 70%+ of the time. Rent everything else.
Rental Advantages Beyond Cost
Renting gives you access to:
- Professional installation crews who set up faster and safer than DIY assembly
- Equipment variety without owning multiple systems
- Maintenance and inspection handled by the rental company
- Liability coverage often included in rental agreements
- Expert consultation on the right setup for each job
When you rent from EZ Access & Equipment, you’re not just getting scaffolding—you’re getting 25+ years of expertise. We help you spec the right system, deliver it on time, and make sure it’s erected correctly. That’s worth more than the rental fee alone.
Make the Call Based on Your Business
Track your actual usage for 12 months. How many days do you need scaffolding? What types of jobs? What configurations?
If the math says rent, rent. If ownership saves money and you have the infrastructure to support it, buy. But don’t buy out of ego or because “real contractors own their equipment.” Real contractors make decisions based on profit margins, not pride.
Ready to Build Safe Scaffolding With EZ Access & Equipment?
Building scaffolding the right way isn’t complicated—it just requires attention to detail and zero shortcuts. Get your base level, lock every connection, install all the braces, and inspect before you climb. That’s the difference between a stable platform and a collapse waiting to happen.
Key takeaways to remember:
- Foundation comes first: Level ground, sole boards, and screw jacks prevent settlement and tipping
- Every component matters: Standards, ledgers, bracing, and couplers all work together—skip one and the system fails
- Load capacity isn’t negotiable: Calculate total weight including workers, tools, and materials before loading platforms
- OSHA compliance protects lives: Guardrails at 10+ feet, competent person inspections, and proper ties aren’t optional
- Common mistakes are avoidable: Level your base, tighten couplers, install bracing, and never overload platforms
- Rent when it makes sense: Most contractors save money renting versus buying, storing, and maintaining their own equipment
Whether you’re putting up scaffolding for the first thing on a renovation job or need a custom configuration for a complex project, EZ Access & Equipment has the gear and expertise to get it done right. We serve contractors across South Florida—from Miami to West Palm Beach—with rental inventory that’s basically a one-stop shop for any scaffold setup.
Ready to get started on your next project? Whether you’re buying, renting, or still deciding, EZ Access & Equipment can walk you through the options. Call us at 954-860-7878 or request a quote online—we’ll make sure you get the right scaffolding setup without overpaying.
FAQs
What is the 3 to 1 rule for scaffolding?
The 3 to 1 rule applies to scaffold stability and means your base width should be at least one-third of the total height. If you’re building a 15-foot scaffold, the base needs to be at least 5 feet wide.
This ratio prevents tipping—taller structures with narrow bases become unstable, especially in wind or when workers move around on platforms. Freestanding scaffolds rely heavily on this rule, though scaffolds tied to buildings can work with narrower configurations since the ties provide lateral support.
Can I build my own scaffold?
Yes, but you need to follow OSHA regulations and local building codes. You’ll need proper components (not improvised materials like lumber or logs), knowledge of load calculations, and a competent person to inspect the structure before use.
Many areas require permits for scaffolding over certain heights. DIY assembly makes sense if you’re trained and have the right equipment—but most contractors rent scaffolds with professional installation because it’s faster, safer, and ensures compliance. Building your own scaffold in town limits without permits can result in fines and work stoppages.
How do you build a scaffold step by step?
Start by leveling the ground and placing sole boards at each standard location in the same place your plans specify. Install base plates with screw jacks on the sole boards, making sure all the legs sit level. Erect standards (vertical tubes) into the base plates—one end near the building, the other creating your bay width.
Connect standards with horizontal ledgers, then add cross bracing diagonally to prevent swaying. Install transoms to support platforms, lay planks across them, and secure everything. Add guardrails and toeboards at 10+ feet. Install ties to the building for lateral stability. Repeat the process for each level, inspecting connections as you go.
What materials make scaffolding?
Modern scaffolding uses galvanized steel tubes for standards, ledgers, and bracing—typically 48.3mm diameter with 4mm wall thickness. Couplers and clamps are also steel, often with zinc plating or galvanizing for corrosion resistance.
Platforms can be wood (lumber planks), aluminum, or steel decking depending on load requirements. Base plates and screw jacks are steel. Sole boards are typically timber or engineered wood. Some lightweight scaffolds use aluminum components, but steel dominates commercial construction because it handles heavier loads.
Everything basically needs to meet OSHA structural standards—you can’t just grab materials off a table and start building. Components must be manufactured to spec, not improvised.
